Saturday, February 23, 2013

Creativity on the Menu

Periodically, I am asked "What do you eat?" when people learn I am a vegetarian. While it is nothing new to me (13+ years), some still seem to find it mysterious/confusing- but it doesn't have to be! This is somewhat of an unusual post for me, but I figured why not. This topic certainly comes up often enough in conversation!

For meal inspiration:

Pinterest is a fantastic source of inspiration on many fronts; lately I've used it as a resource for recipes. I generally shoot for 50% protein 50% carbs with each meal. There is no end to the nutritional information available online; use it to inform your choices. That said- I love fruit, have a major sweet tooth and don't pretend to have perfect eating habits. I make the best effort I can to choose food that will sustain my good health and active lifestyle- but do not follow "diet" style regimens (the Grapefruit Diet, Atkins, Sugar Busters,etc).

Here is what a typical "day of food" looks like for me:

For breakfast, with ample amounts of coffee of course-

photo by blondeponytail.com

                                             Peanut Butter Protein Bars and any type of fruit


For lunch or dinner, with steamed brocoli or sauteed veggies-

photo by lovesveggiesandyoga.com

                                                            Peanut Sauce Baked Tofu


For dessert- although sometimes nothing beats FroYo!

photo by chocolatecoveredkatie.com


                                            Mint Chocolate Chip Ice Cream or fruit or trail mix


For snacks- I'm actually trying these out tonight; we'll see how they turn out!

photo by undressedskeleton.tumblr.com
                                                        Homemade Gummy Fruit Snacks


So there's what I've been throwing into the mix lately. Other favorite standbys are pretzels, hummus, fruit, greek yogurt, veggies, black bean burgers, avocado, sushi...I guess this list could go on and on because truth be told I LOVE TASTY FOOD !
Thursday, February 21, 2013

the Contributor Project

This week I completed a project for a fantastic local non profit, the Contributor. They are experiencing continued growth and have just expanded into additional office space. 
Founding Executive Director Tasha French Lemley explains "the expansion to McKendree United Methodist Church allows for executive and editorial offices, while the vendor program remains at Downtown Presbyterian Church."
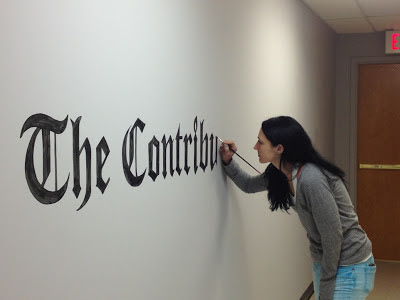
 I was honored when asked to paint the Contributor logo onto the entryway wall at the new space, and completed the project this week. We snapped some pics to document the process:


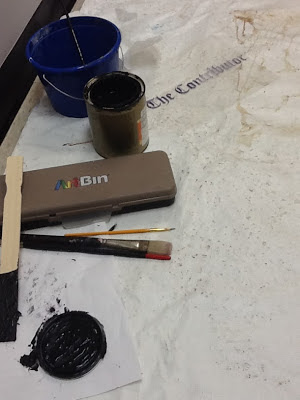
Tools of the trade: artist brushes, acrylic paint, water bucket,  transparency printed with logo.

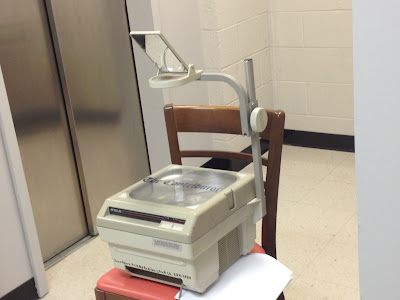
Old school projector + transparency sheet= logo projected onto workspace.

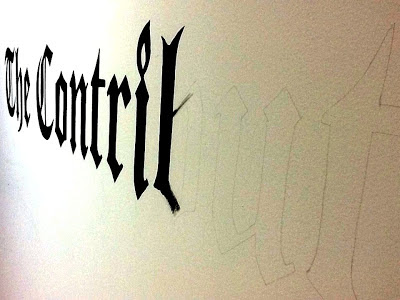
Projected image used to sketch a pencil outline.
First coat in progress.


First coat complete.

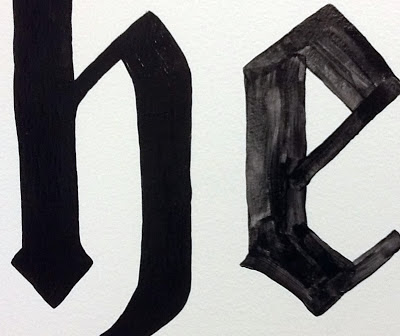
Dark colors require multiple coats to get rid of the streaky look you see in this initial coat.

Second coat in progress.

See the difference each coat makes! Two coats (left) and one coat (right).

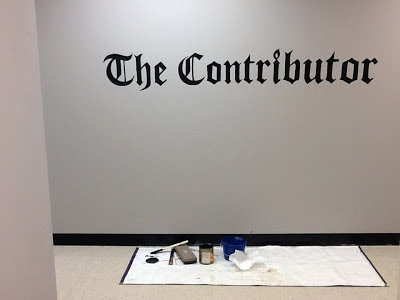
Third and final coat went on quickly and achieved a smooth, bold look.
 I'm very pleased with the results. The Contributor staff is as well; they were a pleasure to work with this week and I am thrilled to have "contributed" to their new space the best way I know how!

Thursday, February 14, 2013

Valentine Hearts


Happy Valentines Day!
I recently worked on a Valentine themed project for a window display.
Hopefully you've all had the chance (often as a child) to create a crafty project using wax paper and melted crayon- it's a pretty familiar process that produces very bright and fun results.


I used Crayola brand crayons to achieve the highest quality color. Some off brands cut costs by using more wax and less pigment- meaning the melted crayon may look a bit chalky.

Generating the amount of crayon shavings needed did take a bit of time and elbow grease (using a cheese grater), but it's well worth it! This is where things start to get messy, and I would suggest covering your work surface with craft paper or newsprint.


Placing one sheet of wax paper down, sprinkle the shavings (as lightly and evenly as possible) onto it and then place another sheet of wax paper on top. Place a protective paper (copy paper, craft paper,etc) between the top sheet of wax paper and the iron (with no steam) and lightly iron away! 
I chose to melt large areas, and then cut multiple smaller hearts from it. 


Using a single whole punch and bright pink yarn, I strung together 6 foot strands of hearts. Threading the yarn through the top hole, gently knotting it once, then threading it though the bottom hole and repeating on the next heart worked to create the garland look I wanted.


The strands are stretched vertically in the window, secured at each end. I love a good pop of color on these grey wintery days!

 XOXOXO